Showing posts with label Monday Made It. Show all posts

Monday, August 4, 2014

Monday Made It - Parking Lot Board

I'm baaaackkk! 

Wow you guys, this summer went by like a blur. Where did all of that time go that I was going to be super productive and create these creative crafts to post on this good ole blog?  


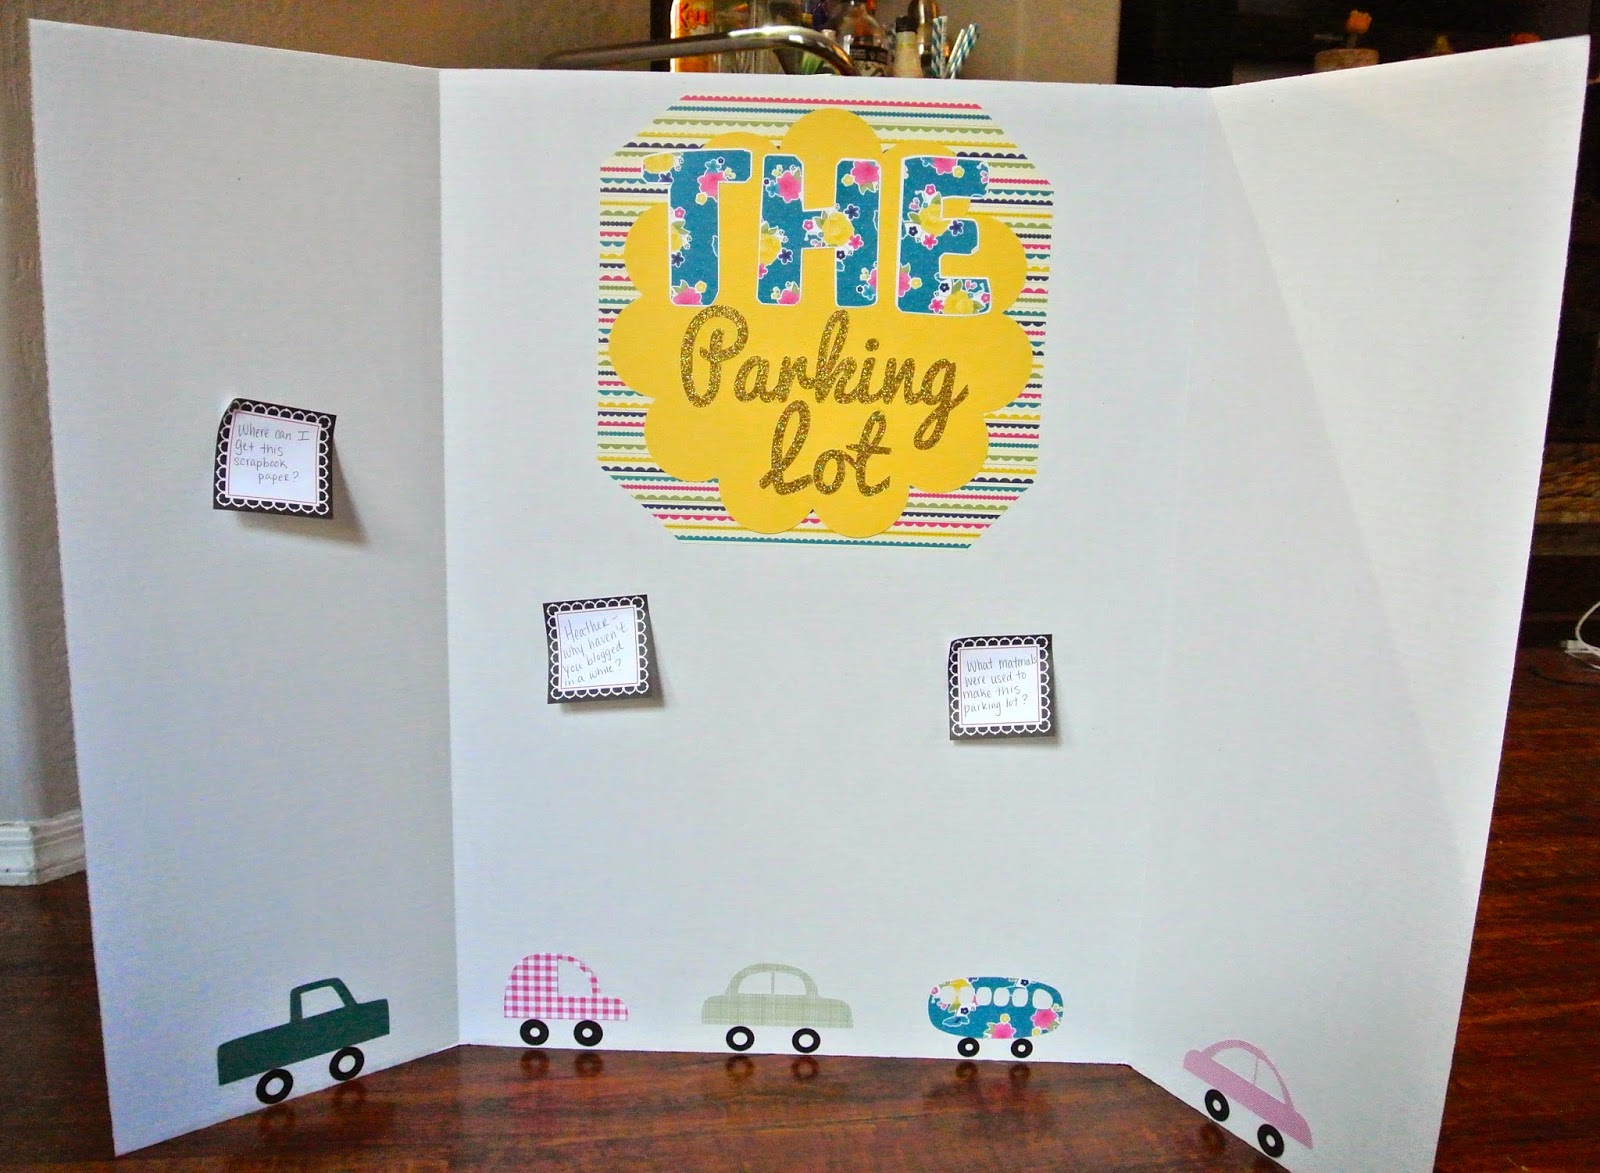
For Monday Made It, I made a Parking Lot board over the weekend for a training I am presenting today. This could be used in your classroom too as a formative assessment, a ticket out the door, or just for good old fashioned questions.  Do any of you use parking lots in your classroom?  I would love to hear your procedure for it if you do!


Let's address the questions on the board, shall we? Haha! 


Good question! 

  • Tri-fold board (Tarjay aka Target)
  • Scrapbook paper
  • Rubber Cement
  • Silhouette Cameo (car shape cutouts are from here)


  • I purchased this scrapbook paper from Stampin' Up. I don't see the designer series paper package that I used for this board but here is one that looks really cute and is similar.


    Well, there are a couple of reasons. I was on vacation for three weeks visiting my sister and her family as well as a road trip up to Nova Scotia, Canada! It was beautiful and I can't wait to post pictures on here soon as a memory for me and to show you all. 

    Another reason is that I started my new job as Instructional Coach last week and it has kept me really busy! I am still adjusting on being out of the classroom and hope that this blog will still be alive and kicking. 

    In the meantime, I hope you all can use the parking lot board idea in your classroom! 


    Be sure to link up to Tara's Monday Made It to post your creations!


    Monday, June 2, 2014

    Monday Made It - Adorable Bell Work Templates


    It's the first Monday Made It for the summer!  I had a little bit of "teacher's block" with this one, but I dug up some old goodies and revamped them.


    Whether or not you teach a grade level that has bell work, you can use these cute power point slides as part of your morning message or morning work.  I usually had my students answer two questions at the beginning of the class. They usually reviewed previous information or had them apply the information. Sometimes I would throw in personal reflection questions to support our behavior program, Capturing Kids' Hearts.

    All you have to do is download the slides! None of them are PDF so you can easily just insert a text box to adjust them to fit your needs. Here's an example of how I used one.


    I hope you are able to use some of these! To download just click the picture. Enjoy!  See a template for these beauties towards the bottom.

    Science themed bell work or morning message template
    Generic template for morning or switching classes - forms are just anything to turn in but like I said before, change it if it doesn't suit your needs!
    Another one you can use for switching classes if needed.
    Insert text on the white label.
    Love this one - it's definitely my favorite and made for a math classroom. Word to the wise, if you don't have LD Shelly Script font downloaded the cute cursive won't show up. You can download it here.
    Bright and cheery!
    Here's a template that I photocopied for my students at the beginning of every week. All I would do then was duplicate the slide and add in my new questions and click save at the end so by the end I had a whole quarter of bell works saved up for the following year. Super easy and efficient!  Because I taught two classes but did so three days in a row (science for three days, social studies for three days, repeat) that is why I have the subject line.  I have uploaded it to Google Docs as a Microsoft Word document so you can edit it to suit your needs. :)  Click the picture below to download.


    Remember to link up with Tara at Fourth Grade Frolics to show off your Monday Made It!


    Sunday, February 2, 2014

    Student Valentines


    Don't you just love Valentine's Day?

    I always struggle every year on what to make for my students. I want to do something cute, but don't want to spend a lot of money and definitely not a lot of time because let's face it; they just want to eat candy, they don't really care about cutesy stuff at that point.

    I wanted to do something different since I didn't want to add to the candy chaos that will not doubt ensue come February 14th.  I was browsing around Target when it hit me! Enter: Angie's Popcorn.


    Target sells these little snack packs that make perfect Valentines for teachers or parents that don't want to doll out high fructose corn syrup to their cute little nuggets.

    I don't think I will be a huge fan of the "vanilla cupcake" flavor, but it's a good thing they aren't for me. :) It was either this or the Tutti Fruity flavor.

    Instead of using the pre written on method of personalizing my bags, I decided to go a more crafty route.

    I created printable labels (see below for the freebie) that I just tied on to the bags. I think this project took me about an hour (or at least two episodes of Pioneer Woman, however you choose to view time).

    I printed the labels on printer paper, but I would've used card stock if I had some handy. I used my paper trimmer to cut the hearts out.

    I just hole-punched two holes into the top of the single serving bags and the papers careful not to break the seal.


    I then used baker's twine (I found mine at Target in the dollar section) to tie the paper onto each bag.


    I love how they turned out; super cute and easy! I decided to put the label on the back just because I thought the front of the popcorn bag was really cute and I wanted it to be displayed and not covered.


    OK so now repeat these steps one billion times, haha!


    Click the picture below to download the labels if you are interested in creating these for your students.


    Don't forget to add a little note on your loot if you don't want your husband to eat it, haha!


    I hope you all are able to use this! Enjoy!

    Monday, August 19, 2013

    Bar Cart

    I have been wanting a vintage bar cart for FOREVER.  My obsession began while watching Mad Men...
    And then my obsession grew even more when my sister and I went to a vintage bar shop called The Hour in Alexandria, VA...


    So I decided it was time to finally indulge in this obsession. Never being one who likes to pay full price for anything, I headed to Craiglist. After a short search, I found this gem for $40. It had rust stains, a loose wheel, and needed lots of love.


    I took the cart apart and then lightly sanded the shelves. I then wiped it clean with a damp paper towel and spray painted it with Rust-Oleum primer. After the primer dried, I spray painted it with a cheery yellow color (Rust-Oleum Marigold).

    I absolutely love the results! My sister and her husband gave me the blue tray as a surprise gift from The Hour store mentioned previously.  It makes the bar cart so beautiful and, honestly, the pictures don't do it justice. I just need to get some more fun vintage bar accessories and better glass and then my bar cart will be complete!
     

    Monday, August 5, 2013

    Ticket Out the Door Poster


    My name is Heather and I am a Pinterest addict.

    Whew, that felt good to get it out. I found this genius idea on Pinterest and had to recreate it for my classroom.

    First of all, I have to give thanks to my Silhouette Cameo machine, without it I would not have been able to complete this project. It saves me so much time and frustration.

    I love it and it is going to be a great launch/closure. Not to mention, it will be super easy to tell which students did not do it. This could serve so many purposes, but here's a few I have thought of...


    Can you think of any other ideas to use this for? It's just fantastic!


     Don't forget to link up with Tara's Monday Made It!


    Monday, July 29, 2013

    White Deer Head - Fake Out

    I have been pining over these white animal heads for a while now. Am I a hunter? No. Do I enjoy taxidermy? No, not particularly. So why do I like these? I have no idea, but I am totally in love. The only issue was that I loved this one, but I didn't want to spend $99 on it. Call me cheap, but spending almost $100 on a fake deer head trend wasn't something I was interested in doing.

    I saw this really good idea on a blog and for the life of me I can not remember where it was from! If you know, please comment below so I can give them credit.

    I went onto Ebay and searched for deer heads until this one came up. When it came in the mail, needless to say it was an exciting day indeed. 

      
     Luckily, the head and the antlers separate, so it makes it so much easier to spray paint, especially if you paint it two toned like I did. 

    I used a white spray paint (no primer needed, but lots of coats!) as well as an antique gold spray paint for the antlers. This ended up being a last minute addition because I happened to have the gold spray paint, but I love the effect. The gold isn't too glitzy or tacky looking, but makes it a little different than all the rest I've seen. All in all the project cost me less than half what it would have been already done.  This one is cool too, but I am not even going to pretend like I know how to DIY that!


    Would this be something you would ever do?

    Don't forget to link up with Monday Made-It so I can steal your ideas too and not give you credit for it, just kidding!!! ;)

    Monday, July 1, 2013

    Monday Made It - Wedding Edition

    Have you ever wanted to make a ridiculously huge paper flower??  OK, well maybe not everyone shares this aspiration, I have to tell you I absolutely love the result. This is probably my favorite craft I have ever done. I am going to put these on the archway during the ceremony at the wedding, but I also think they would be cute stapled up in a classroom or stacked to create a small accent wall in your home. Click {HERE} to get the tutorial. Here's how the ended up...


    Basically, each petal is a 12x12 cardstock sheet. Cut out a shell or lightbulb like shape (the more random the better ~ get wiggly with your cutting!) and then accordian fold them. Hot glue the petals together strategically stacking and spreading as you go. We ended up using seven petals per flower because let's be honest, odd numbers are winners.

    The middles are just made up of two different colored circles, one cut smaller than the other and then fringed. Fold up randomly and then hot glue them in the center of the flower.


    They are huge and I happen to love abnormally sized objects! Note the giant pocket watch in the background.


    I hope you all get to make this craft. The only issue is that where do I keep these bad boys until the wedding? We might need to use our dining room table eventually... Oh well, it works for now!


    Don't forget to link up to Tara's Monday Made It!