Sunday, August 24, 2014

A Few Things - Back to School Version

It's Back to School time!!! Or if you live where I live, it's been Back to School time for a few weeks now, but better late than never, right?  I love a good theme so get ready!

Here are some of my favorite Back to School ideas that I have seen floating around.

These are too perfect. I wish I was more talented in the art of cake decor.

Gift wrapping idea for back to school (or Christmas, or birthdays, or Hanukkah, or Tuesdays...) Mine would not look this cute if I tried it, but I am going to pretend that it would.

Why don't they make this desk in my size???!!! This is from a children's store, The Land of Nod, and I LOVE it!! It even has a cup holder for my wine.


I love everything on here, but I think my favorite is the chalkboard cake. I didn't even know you could do that!!  I don't know how appealing it would be to eat a black cake, but who cares? It's too cute to eat anyway! Plus I am a little partial to this because I used those library cards in the #1 spot for my wedding.


The Teacher Wife is AMAZING!  I love these!!!

Those are just a few of the wonderful things that I have seen.  Happy back to school!

Thursday, August 7, 2014

Beginning of School Year Gift

Pinterest has the cutest ideas EVER for beginning of the school year gifts. Does anyone remember what they did before Pinterest?  I don't even try to think creatively anymore; I just automatically go on Pinterest now before I even activate my brain.

I wanted to make my new teachers a little gift to wish them good luck on their first day with their students!   I used this pin from Pinterest as my inspiration.


All you need to make this is the free printable (available at the bottom of the post), small snack sized ziplock baggies, a paper cutter or scissors, a stapler, and M&Ms. 

I used MEGA M&Ms which I had never seen before and those were a big hit because they are so huge! I have pretzel M&Ms pictured below however because I ran out and had to use my back up stash for the example. #bloggerproblems


Just cut out your printable after you add text to add your message on the back. Don't forget to rotate it  so that the message is readable and the right side up when you fold it!


Fold your message in half so that you have a tent and fill your baggie up with the candies. Slip the tented message over the top of the ziplock baggie, staple it in place, and then you are good to go. Super simple!


It took me about an hour to make over 20 of these baggies from start to finish (including designing the note!) so once you get your system down it goes pretty quickly!


I am having a few technical difficulties with this printable. I know you need to open it in Power Point so you can edit your own message on the other side of the note (see my example above).  If I give you a link to a PDF, you can add text to it, but not rotate it which is required when you do a ziplock bag topper like this.  Hopefully the font carries over when you open this Power Point template, but if it doesn't let me know via email or comment OR download the fun FREE font called Pacifico. :)
Click the picture below to download the potential tricky freebie.


I hope you are able to use this in your classroom and that the freebie actually works, haha!  Have a wonderful first day of school if you haven't started already and if you have I hope you had the best first day possible. :)


Monday, August 4, 2014

Monday Made It - Parking Lot Board

I'm baaaackkk! 

Wow you guys, this summer went by like a blur. Where did all of that time go that I was going to be super productive and create these creative crafts to post on this good ole blog?  


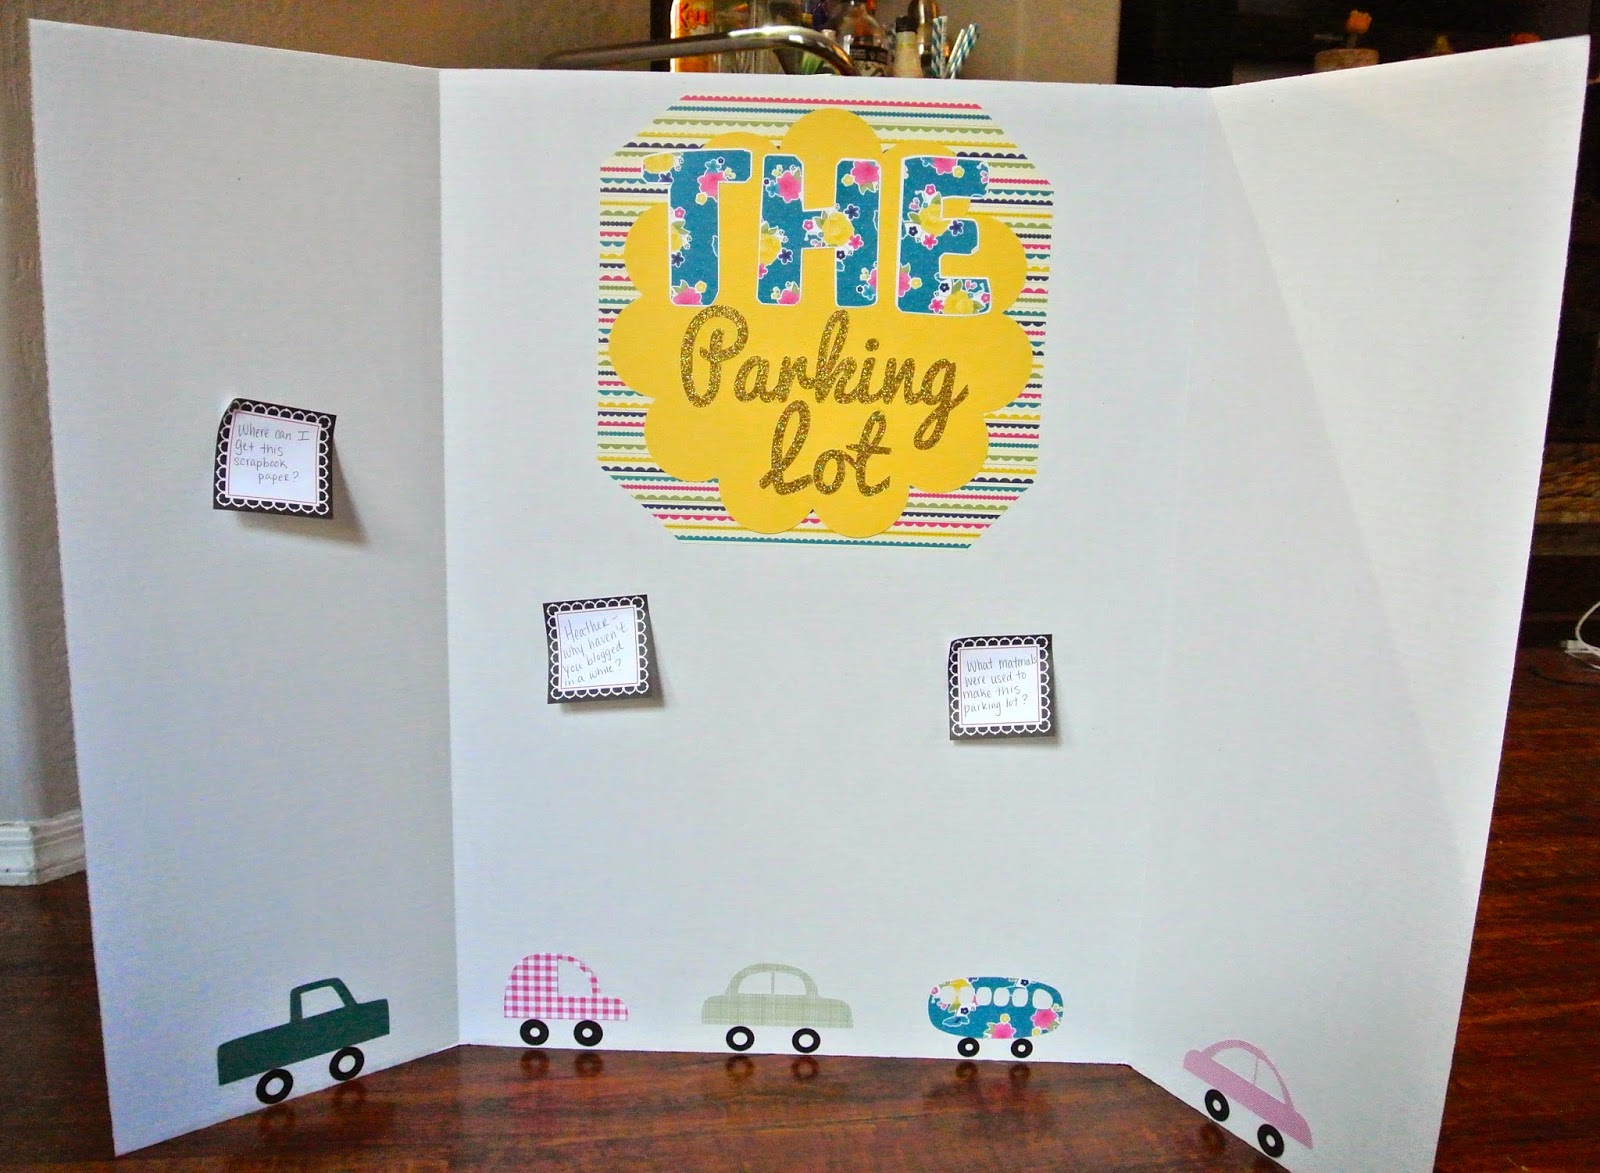
For Monday Made It, I made a Parking Lot board over the weekend for a training I am presenting today. This could be used in your classroom too as a formative assessment, a ticket out the door, or just for good old fashioned questions.  Do any of you use parking lots in your classroom?  I would love to hear your procedure for it if you do!


Let's address the questions on the board, shall we? Haha! 


Good question! 

  • Tri-fold board (Tarjay aka Target)
  • Scrapbook paper
  • Rubber Cement
  • Silhouette Cameo (car shape cutouts are from here)


  • I purchased this scrapbook paper from Stampin' Up. I don't see the designer series paper package that I used for this board but here is one that looks really cute and is similar.


    Well, there are a couple of reasons. I was on vacation for three weeks visiting my sister and her family as well as a road trip up to Nova Scotia, Canada! It was beautiful and I can't wait to post pictures on here soon as a memory for me and to show you all. 

    Another reason is that I started my new job as Instructional Coach last week and it has kept me really busy! I am still adjusting on being out of the classroom and hope that this blog will still be alive and kicking. 

    In the meantime, I hope you all can use the parking lot board idea in your classroom! 


    Be sure to link up to Tara's Monday Made It to post your creations!